How to create a pre-anesthetic assessment step by step
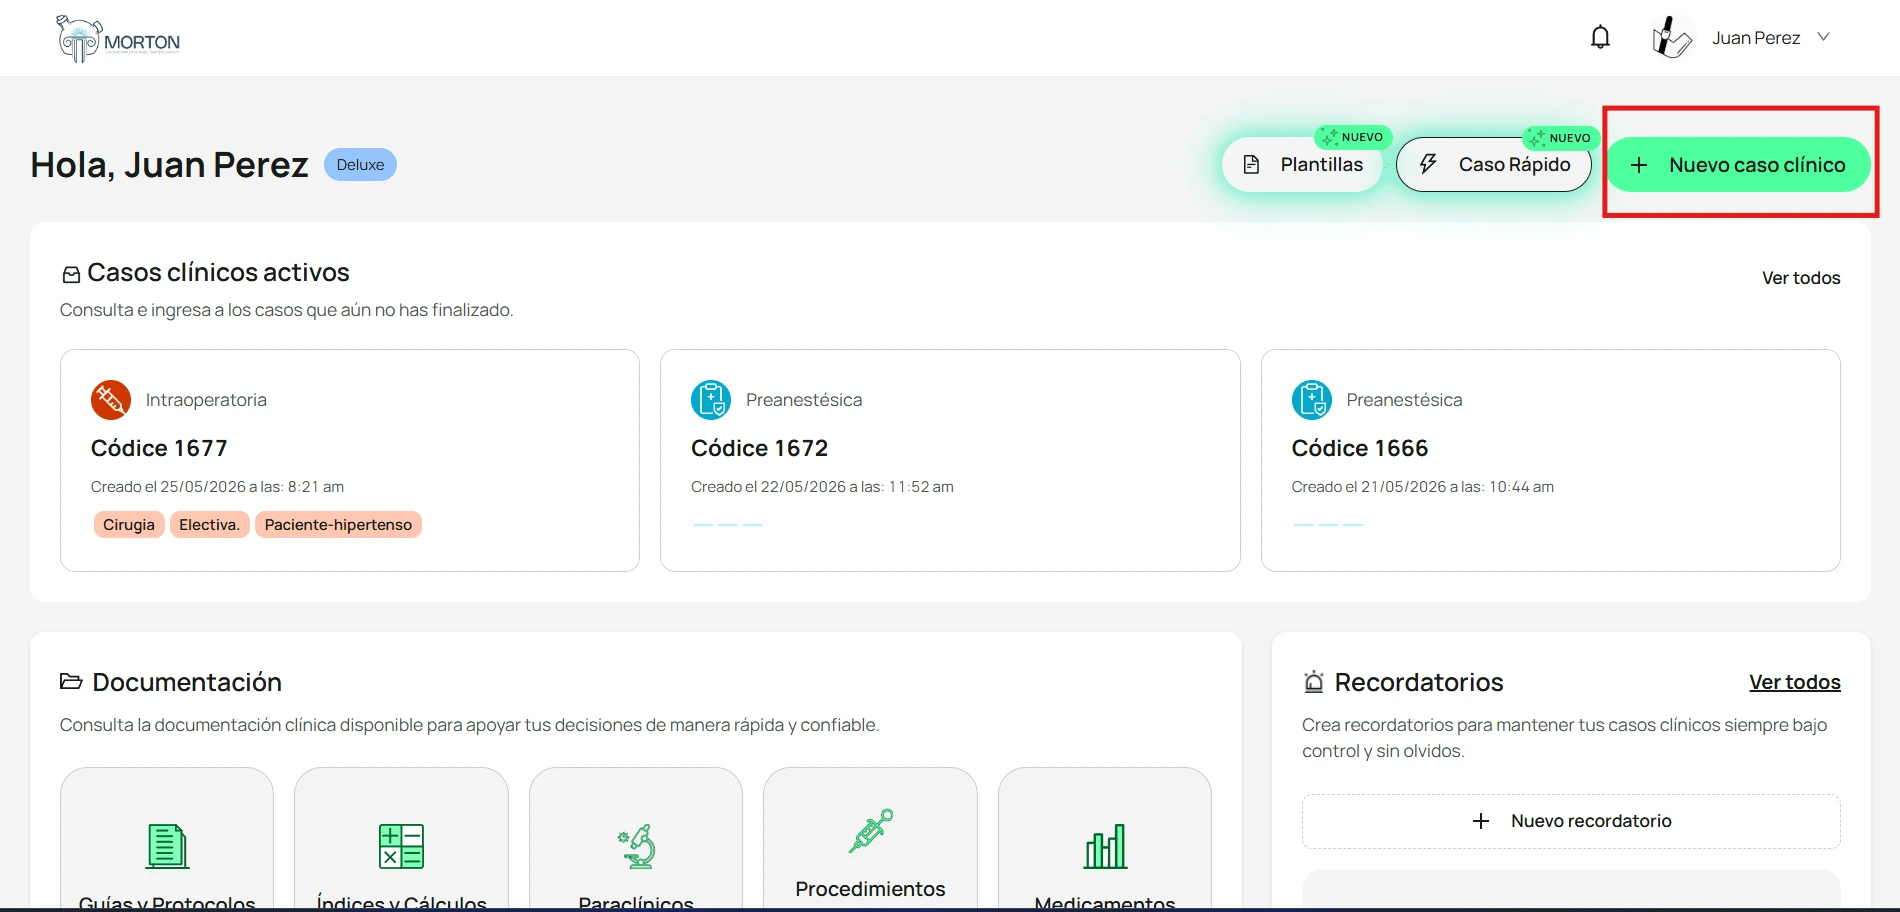
Open "New clinical case"
Click New clinical case in the top-right corner of the home page.
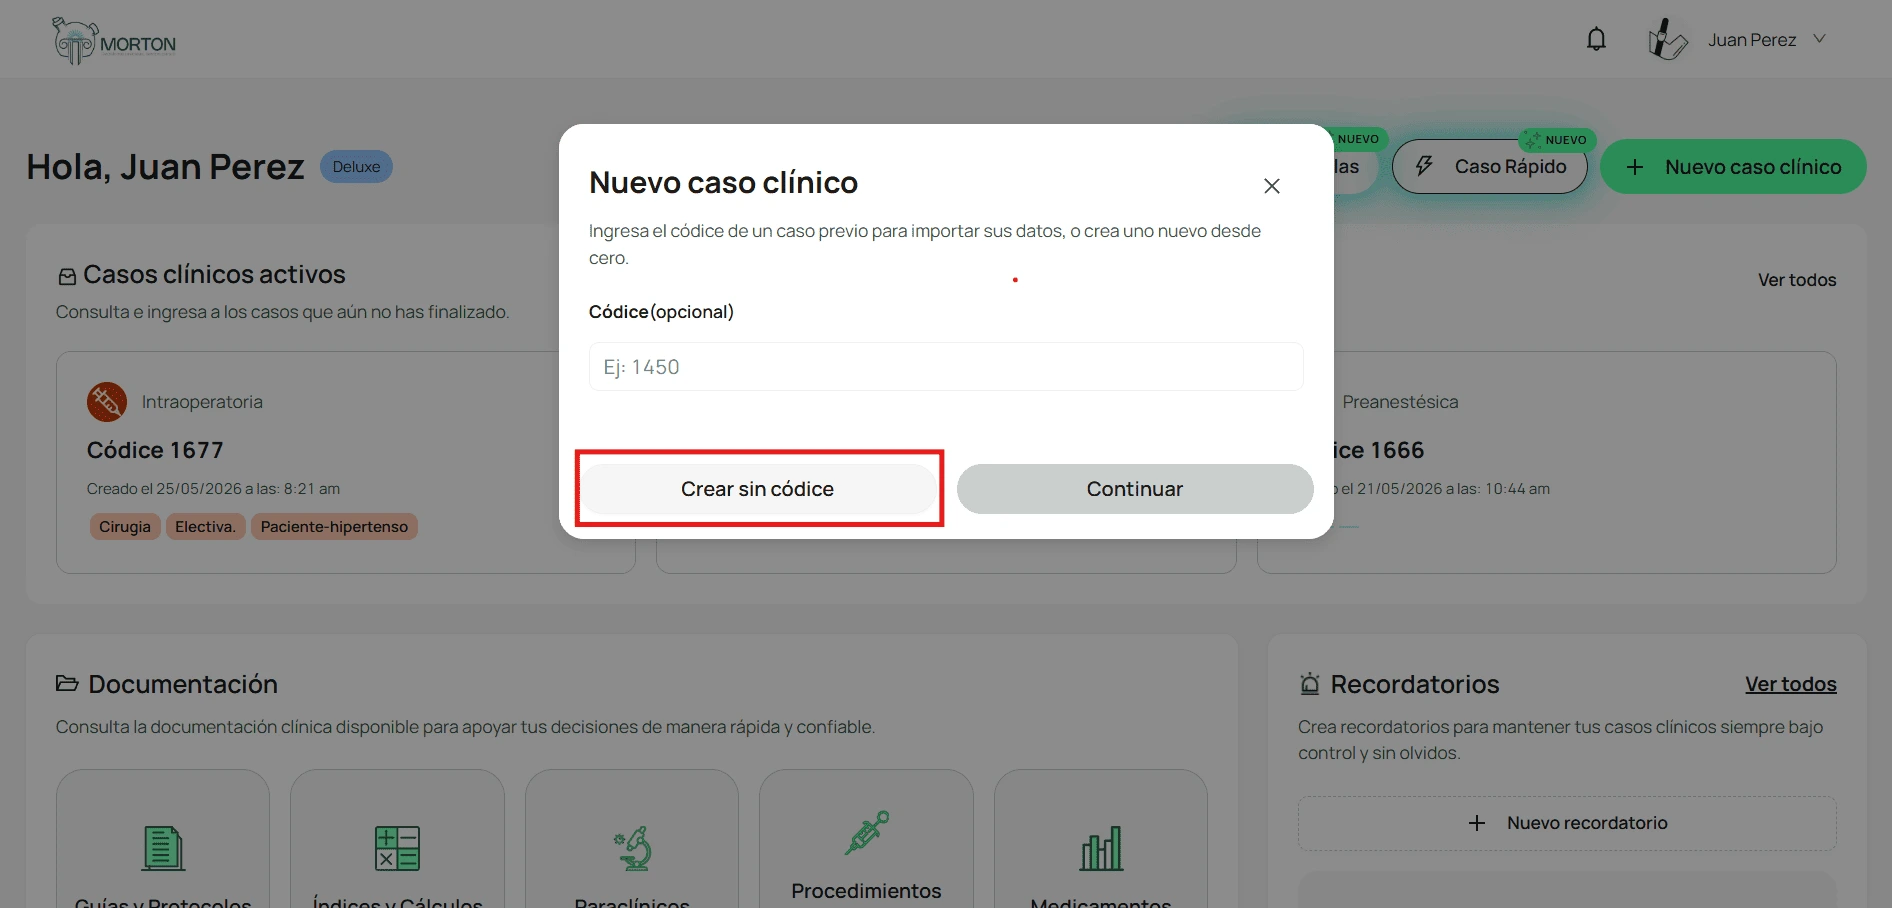
Create the case without a codex
Click Create without codex to start from scratch. If you’re picking up a previous case, enter its Codex and click Continue.
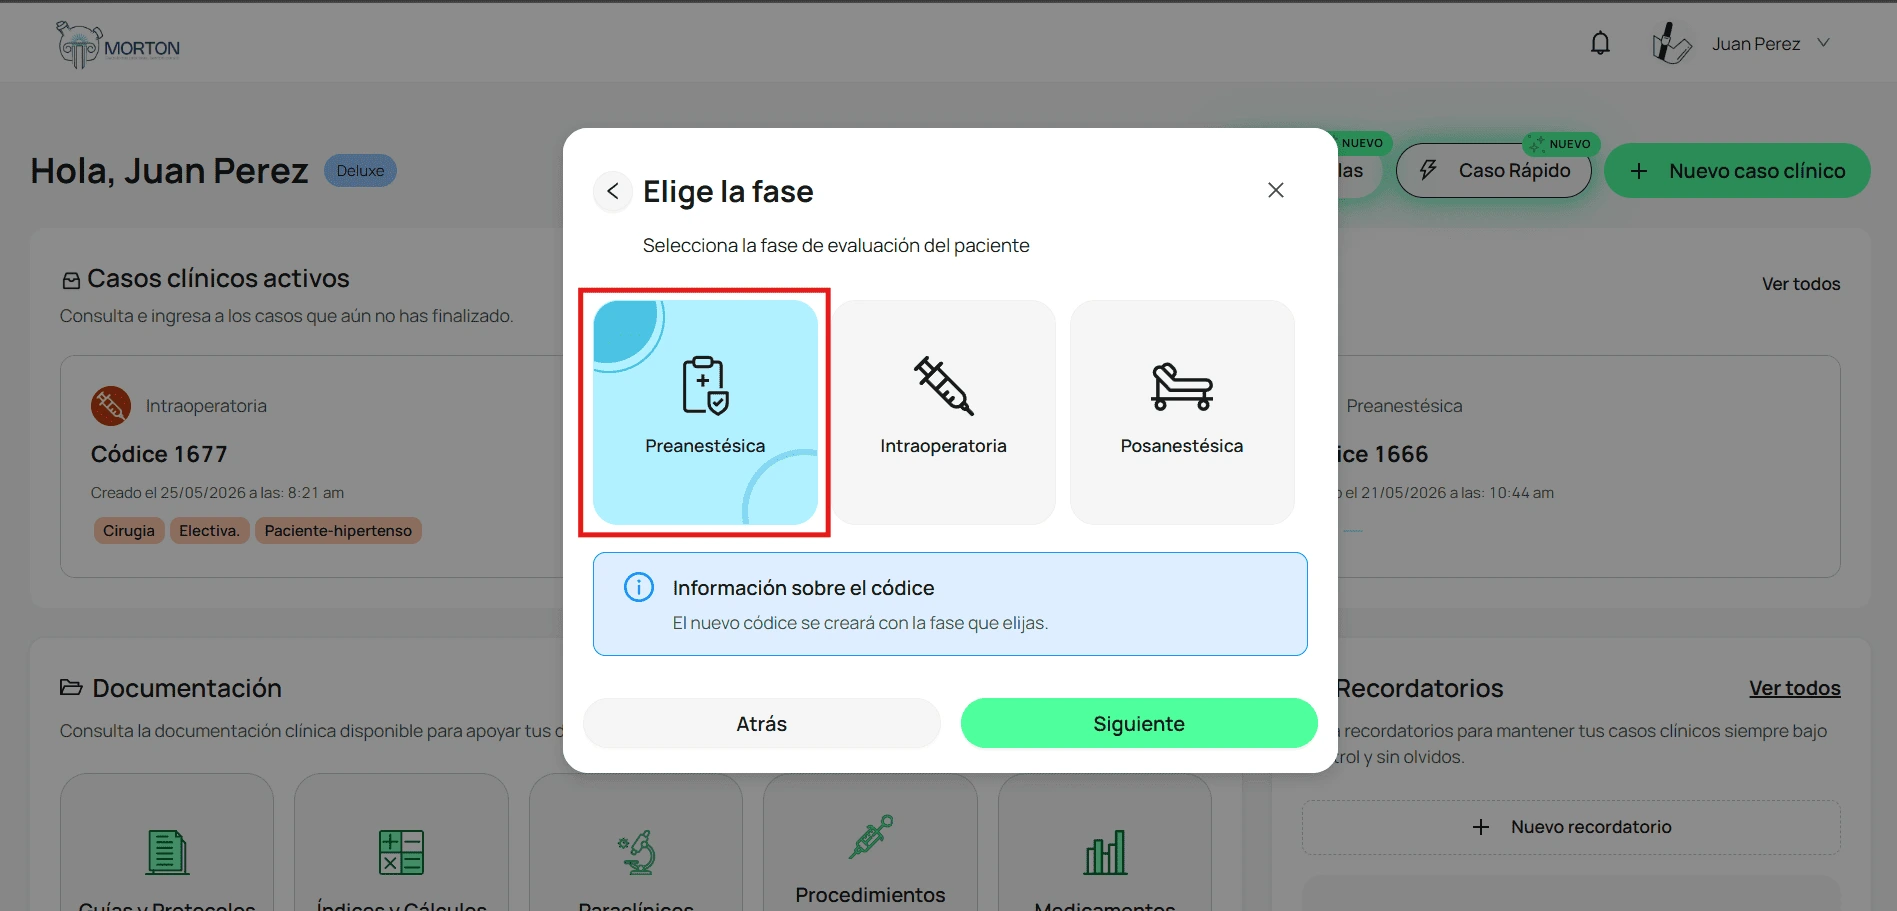
Choose the pre-anesthetic phase
Select Pre-anesthetic and click Next. On the templates screen, pick a saved template to save time or, if you don’t have one, click Next to start a new one.
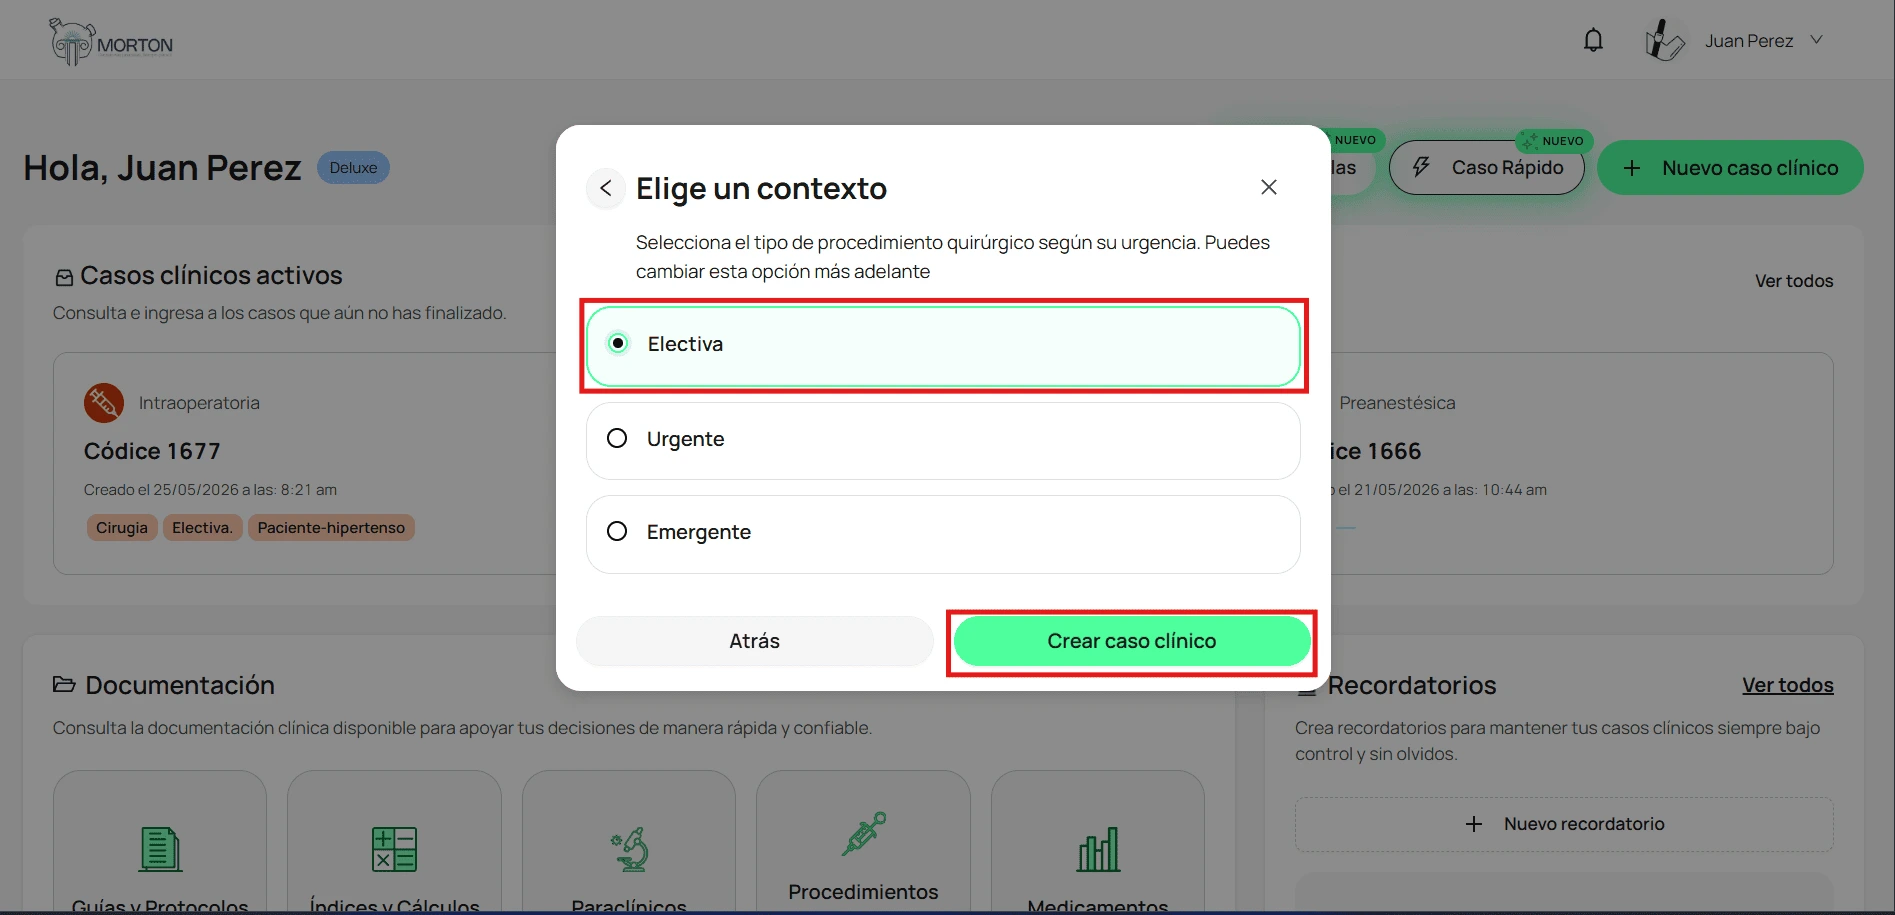
Choose the procedure context
Mark the procedure’s urgency —Elective, Urgent, or Emergent— and click Create clinical case. You can change it later.
Accept the disclaimer
Read the disclaimer and click Accept and continue.
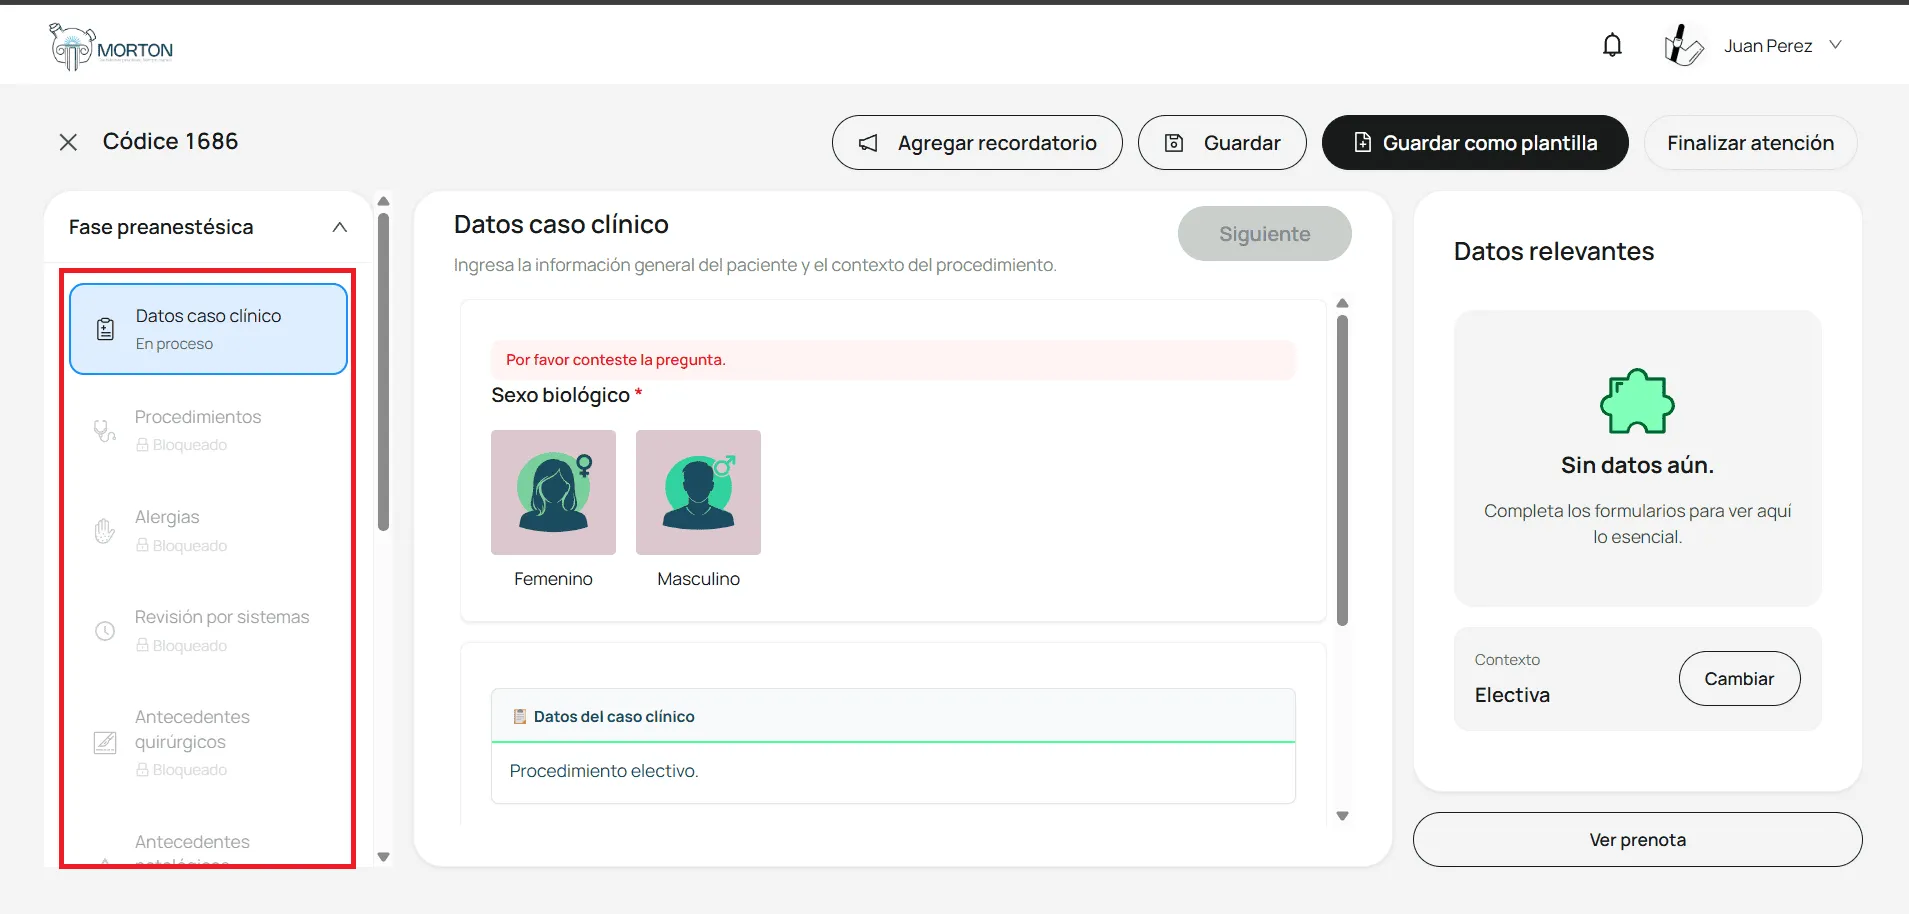
Complete the case sections
Complete each codex section in order, starting with Clinical case data; finishing one unlocks the next.
- Wondering what each section asks for? See Clinical data required for a complete note.
Generate the analysis
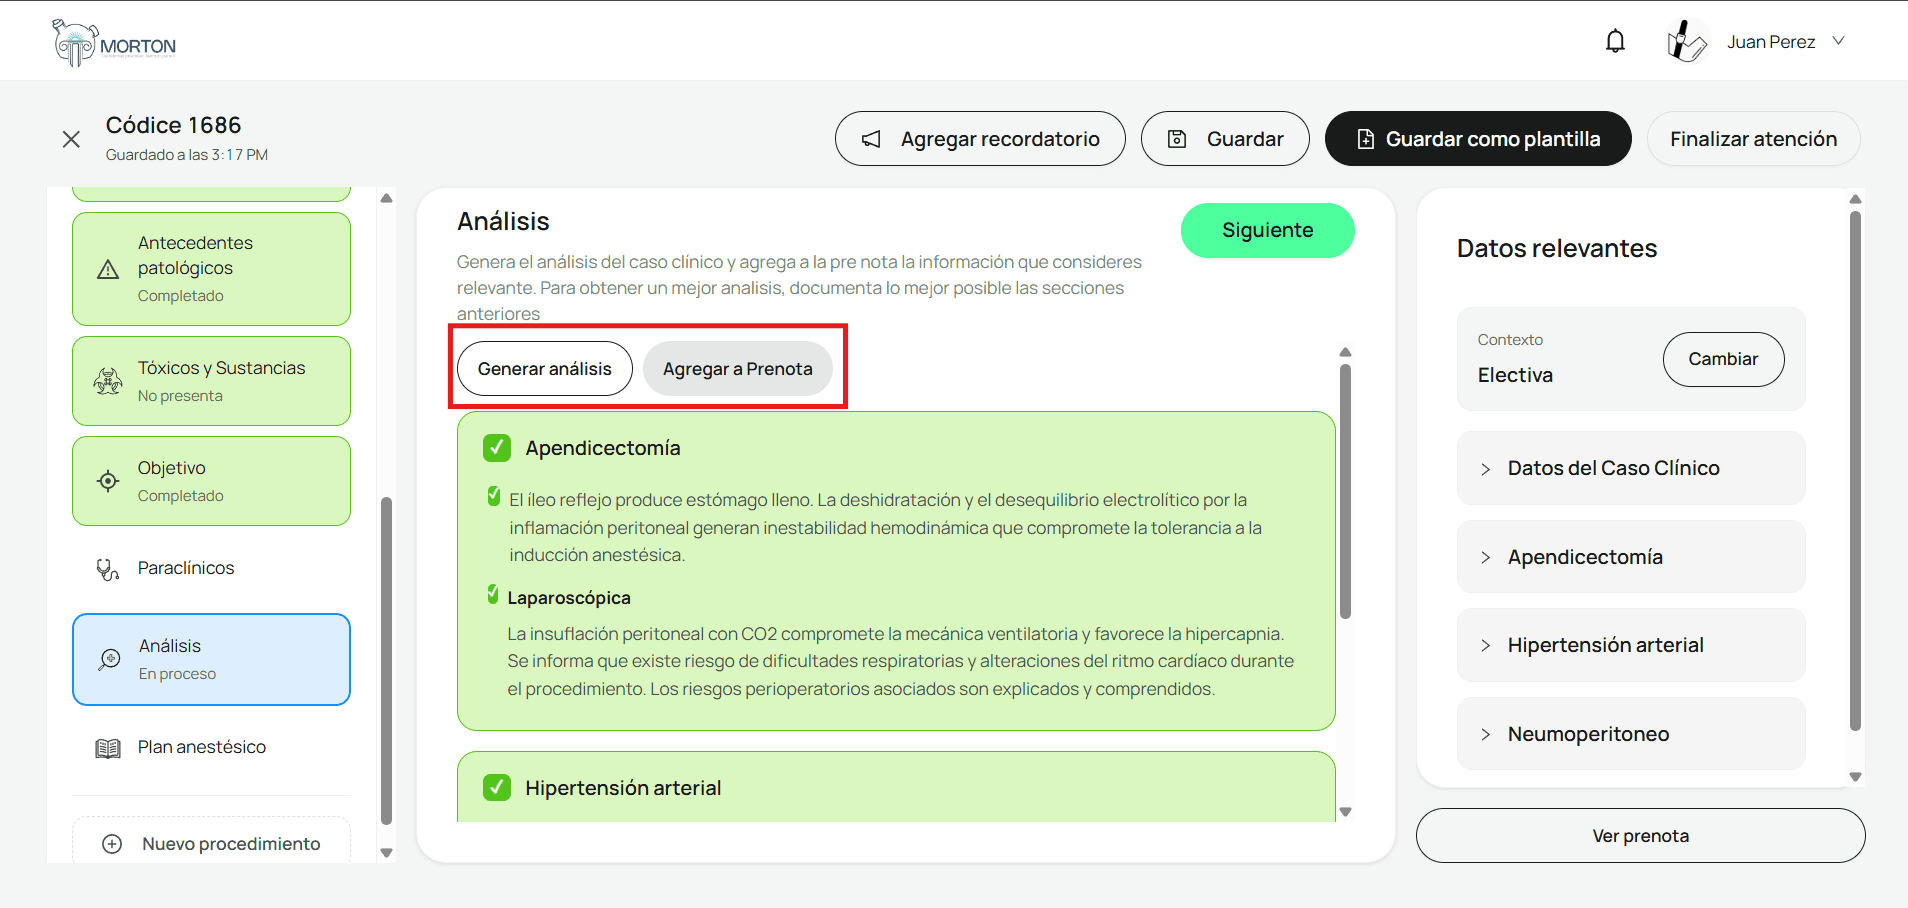
Open the Analysis section and click Generate analysis. Morton reviews all the case information and suggests the findings that matter for anesthetic practice. Check the ones you want to include, click Add to prenote, and then Next.
Build the anesthetic plan
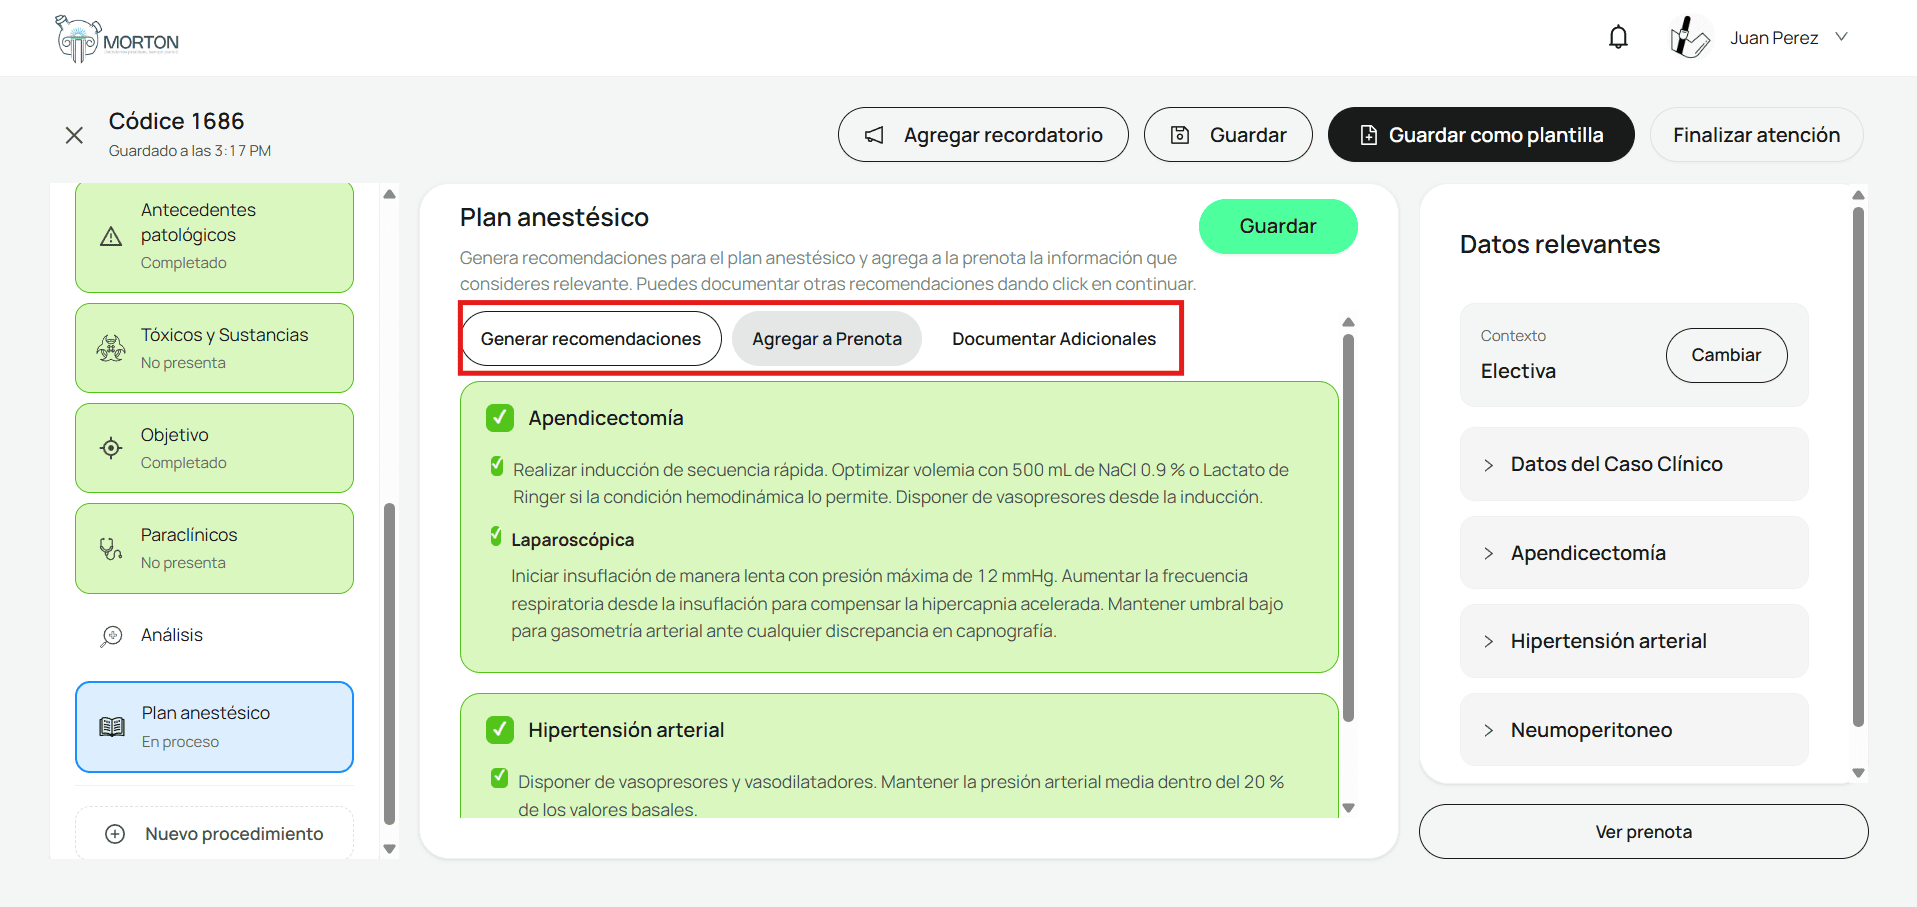
Open the Anesthetic plan section and click Generate recommendations. Check the ones you want to include; to add more, click Document additional items and select the options. Click Add to prenote and then Save.
Generate the prenote
Confirm with Yes in the “Case finished” window that appears when you save the plan. The “Prenote” panel opens; click Generate prenote and the full note appears with all the case information.
- Need to adjust it before saving? See Edit the prenote before saving it.
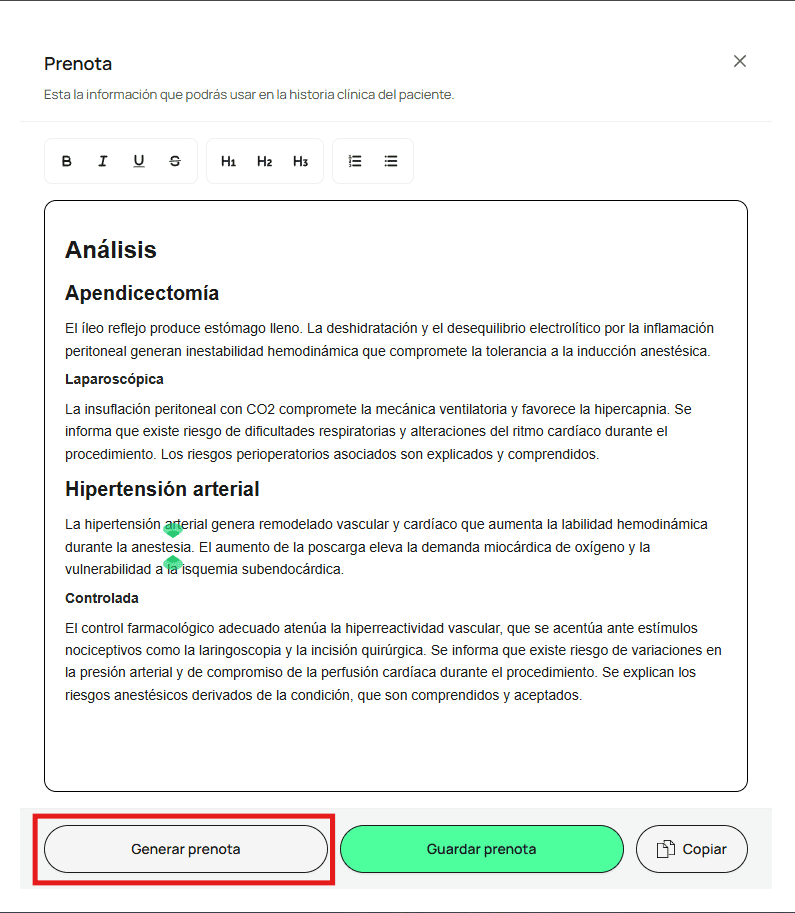
Your prenote is ready with all the case information. Review it, adjust it, and copy it into your institution’s medical record. The case stays in your history under its Codex, so you can pick it up again or move on to the intraoperative phase.
What if something goes wrong?
A section shows as "Locked"
Sections unlock in order. Complete the previous one to unlock the next.
You generated the prenote again and content was added on top
Each generation adds the new content without erasing your edits. Delete anything that no longer applies before you save.
Related articles