How to document the intraoperative phase
If you already have a pre-anesthetic codex, keep it handy so you can import it and skip step 6. If not, the case starts from scratch and Morton asks for the patient’s clinical data later on.
Open a new clinical case
Click + New clinical case in the top-right corner of the dashboard.
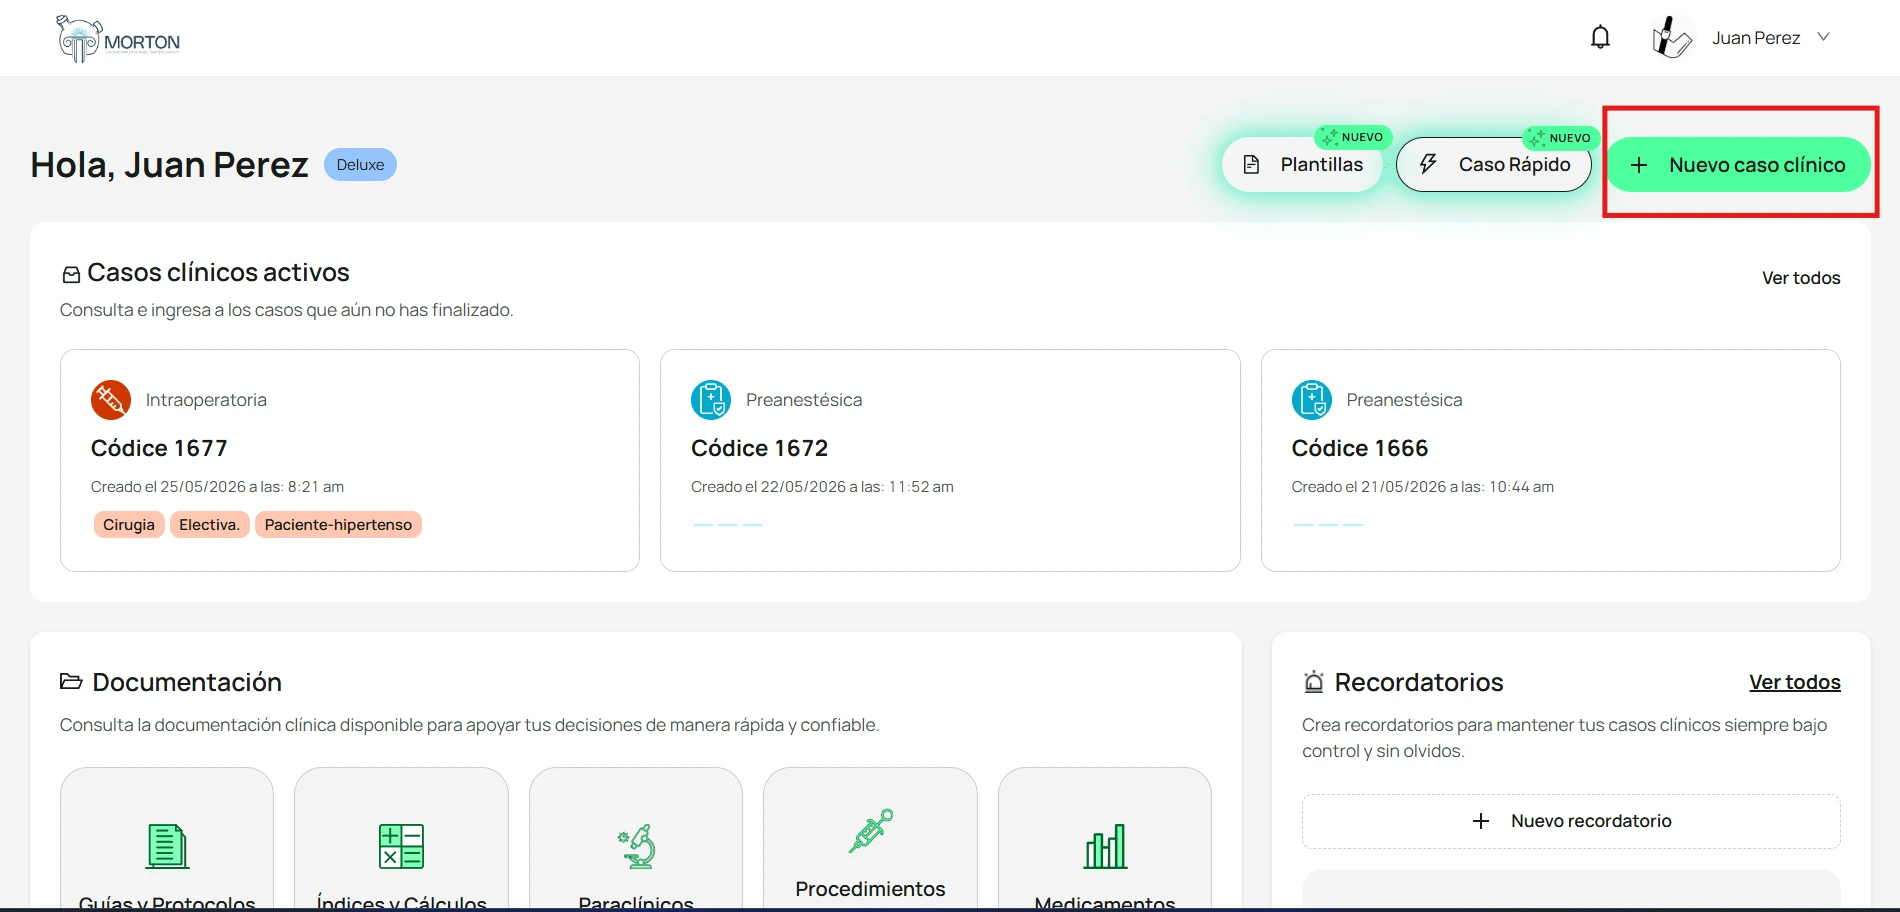
Choose how to create the case
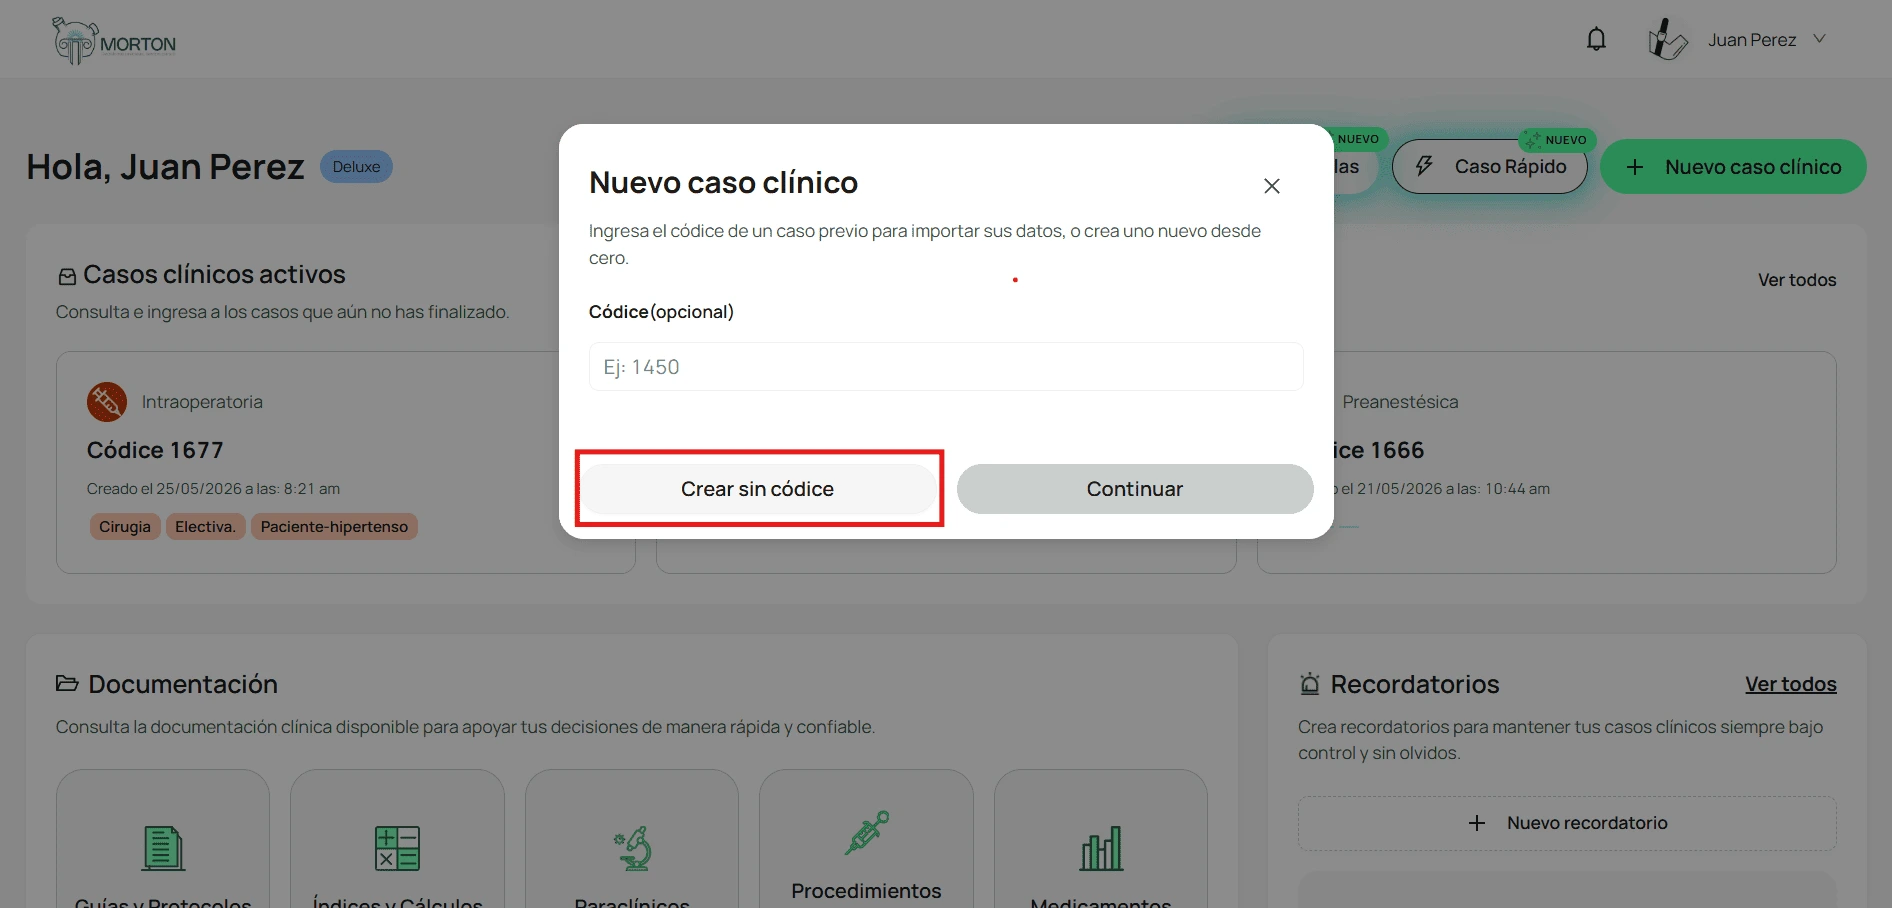
The “New clinical case” window gives you two options:
- With an existing pre-anesthetic codex: type the codex in the field and click Continue. Morton imports the patient’s data, the procedure, allergies, substance use, and medical history, and step 6 of this guide won’t appear.
- Without a codex: click Create without codex. The case starts empty and Morton will ask for the patient’s key data later on.
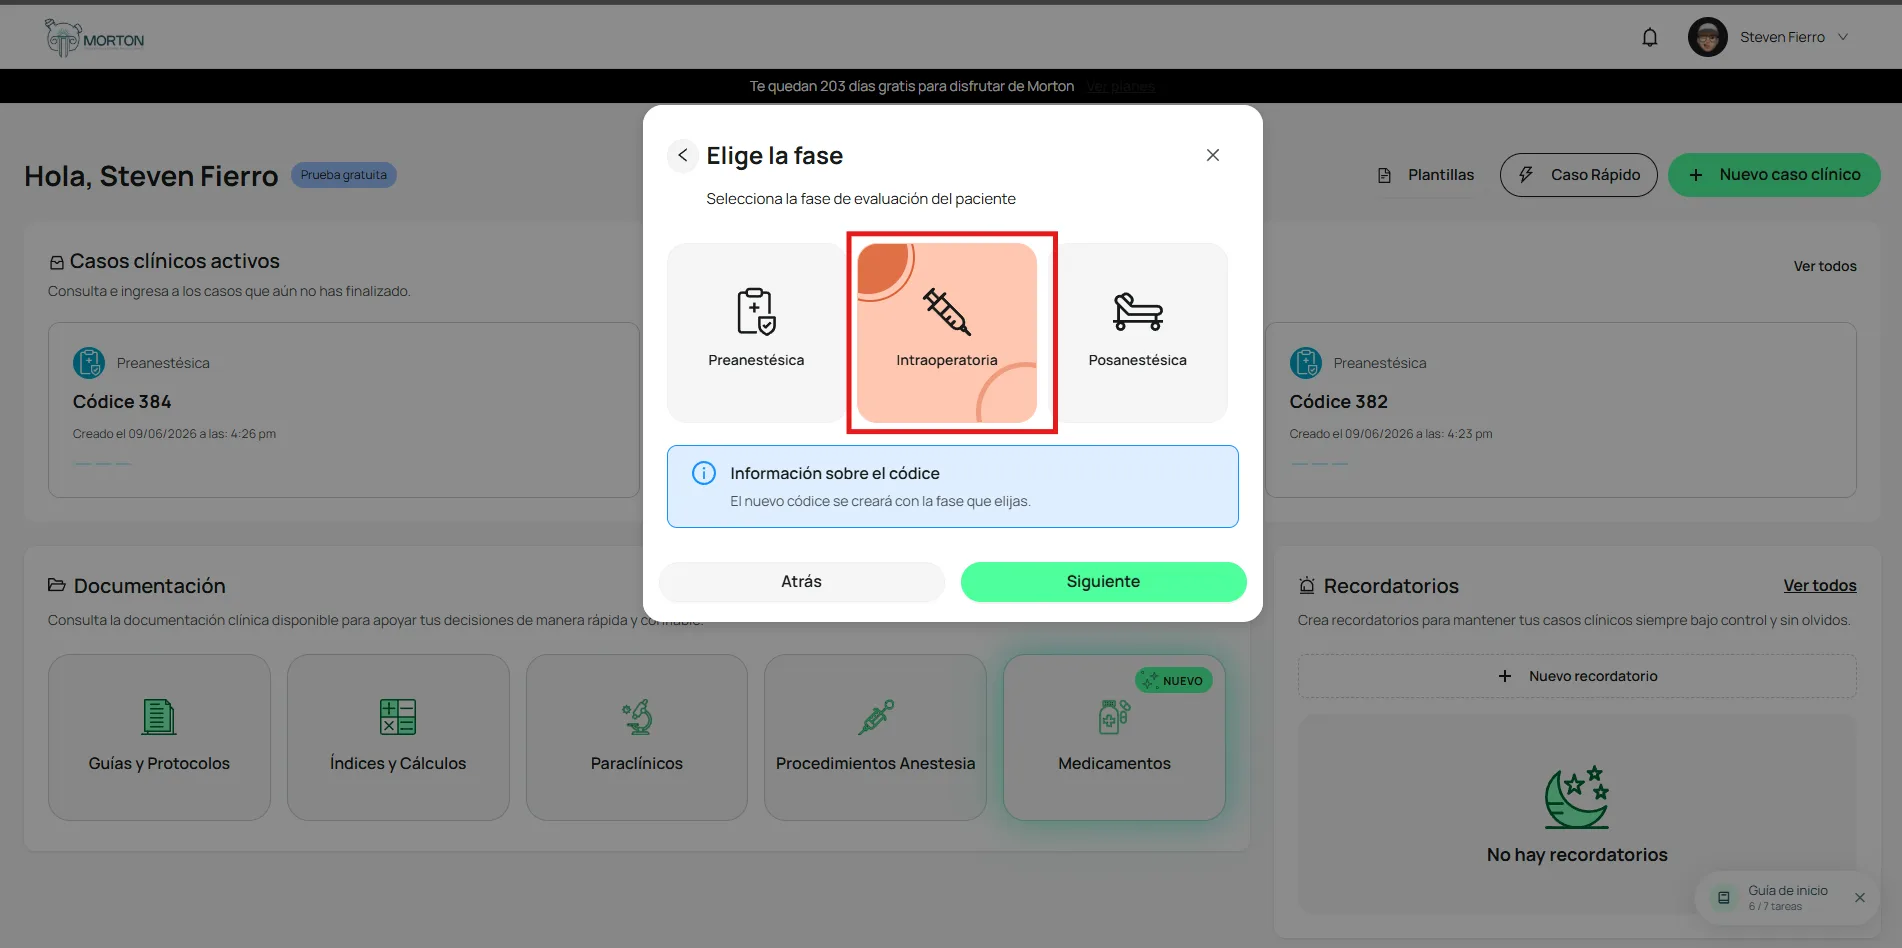
Choose the Intraoperative phase
Under “Choose the phase,” select the Intraoperative card and click Next.
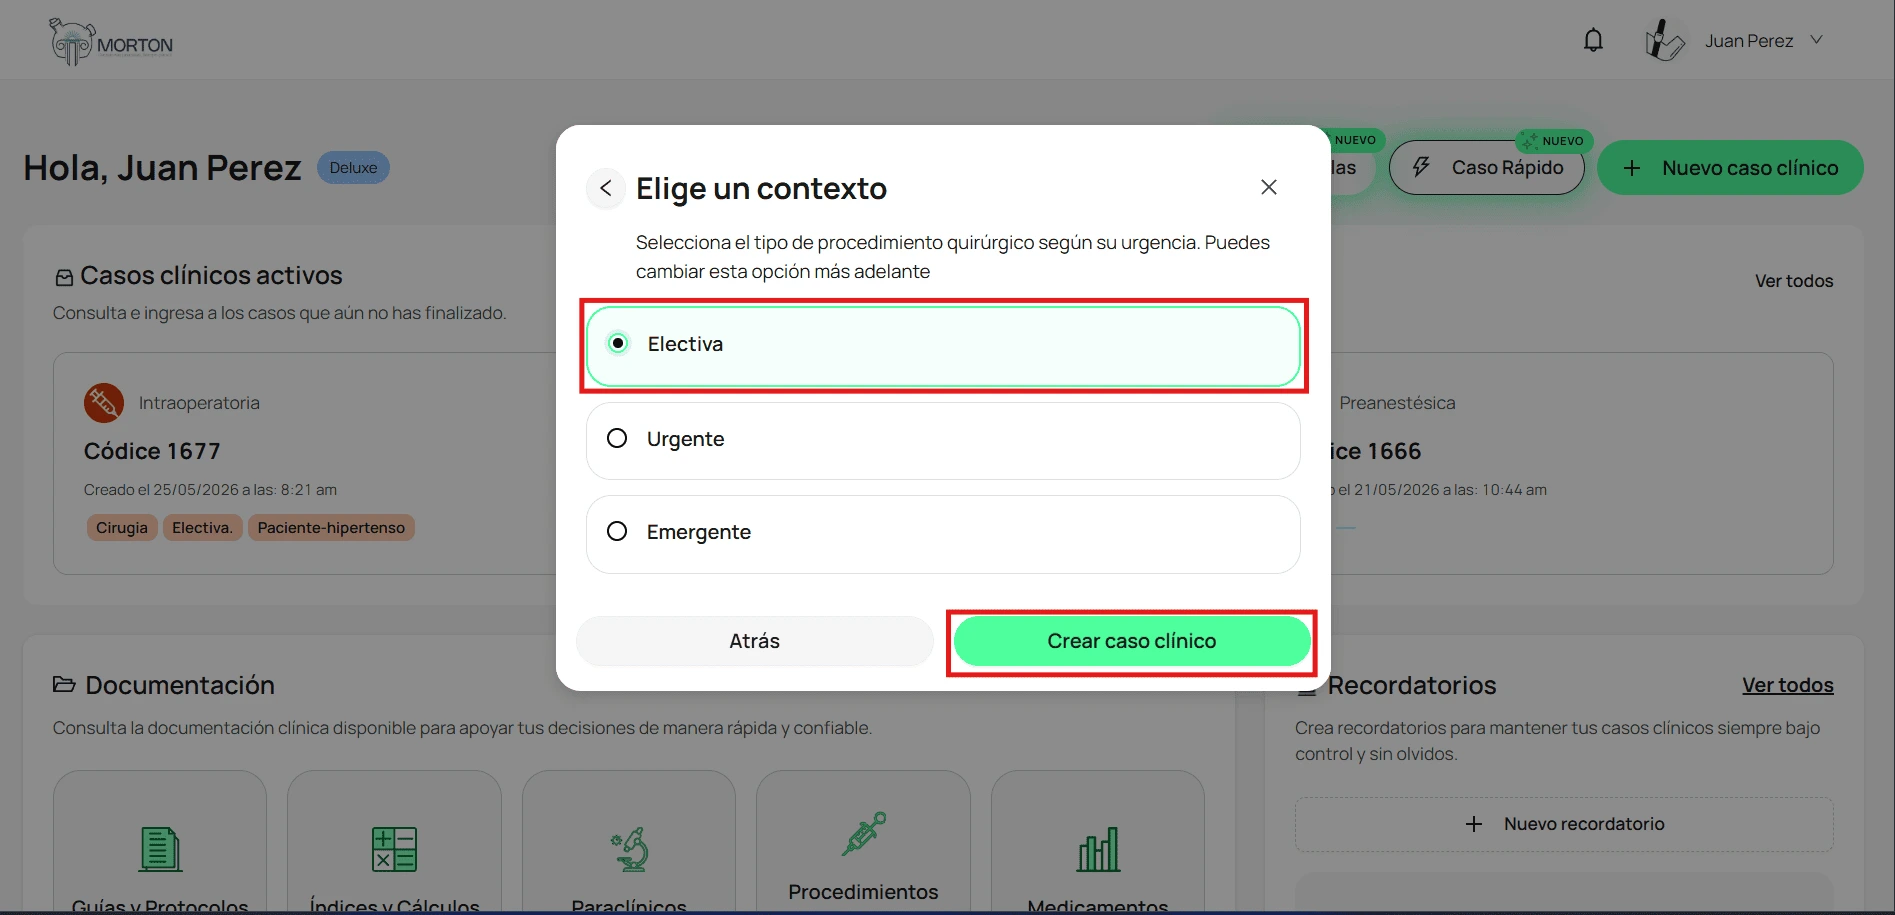
Pick a template and context
If you have a saved template for this procedure, select it and click Next; otherwise, just click Next without picking one. On the following screen, choose the context —Elective, Urgent, or Emergent— and click Create clinical case.
Accept the disclaimer
Read the “Disclaimer” window and click Accept and continue. If you’d like more detail first, click Learn more.
Fill in the case's key data
This step only appears if you created the case without a codex. With an existing pre-anesthetic codex, Morton already has everything loaded and you can skip to step 7.
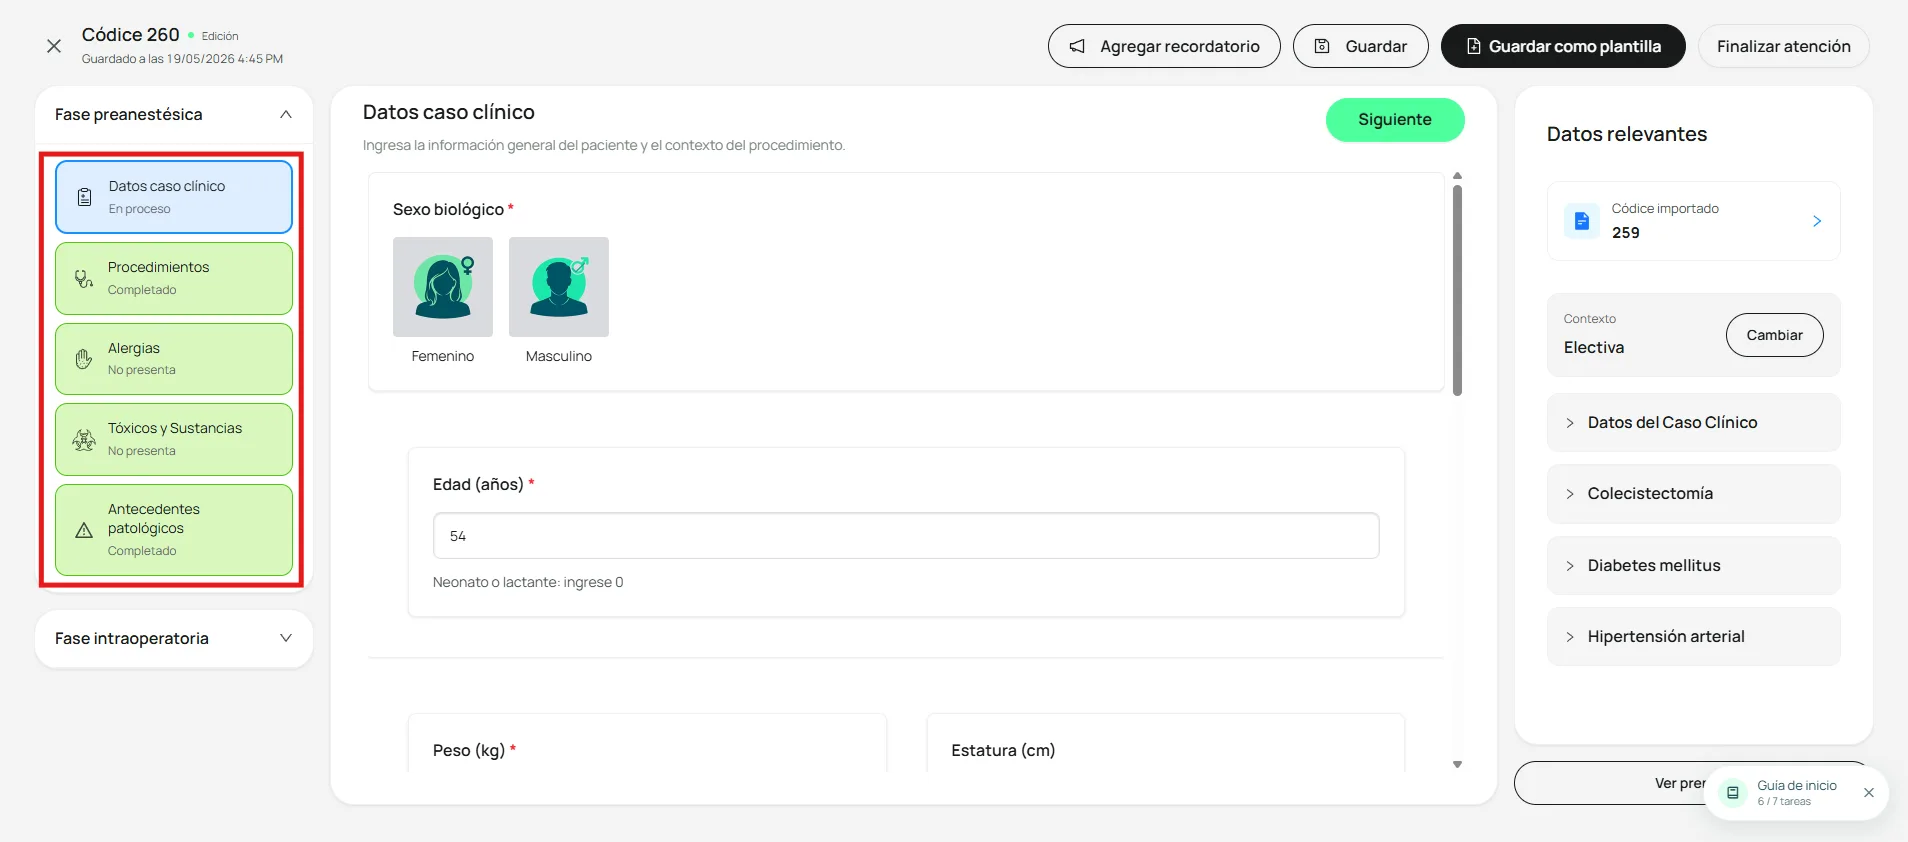
The side panel shows the Pre-anesthetic phase with five subsections to complete in order: Clinical case data, Procedures, Allergies, Tobacco, alcohol, and substances, and Past medical history. Each one opens a short form, a condensed version of the full pre-anesthetic assessment. Click Next after each subsection to move on. Once you close the last one, the Intraoperative phase unlocks.
Fill in the 14 sections of the intraoperative phase
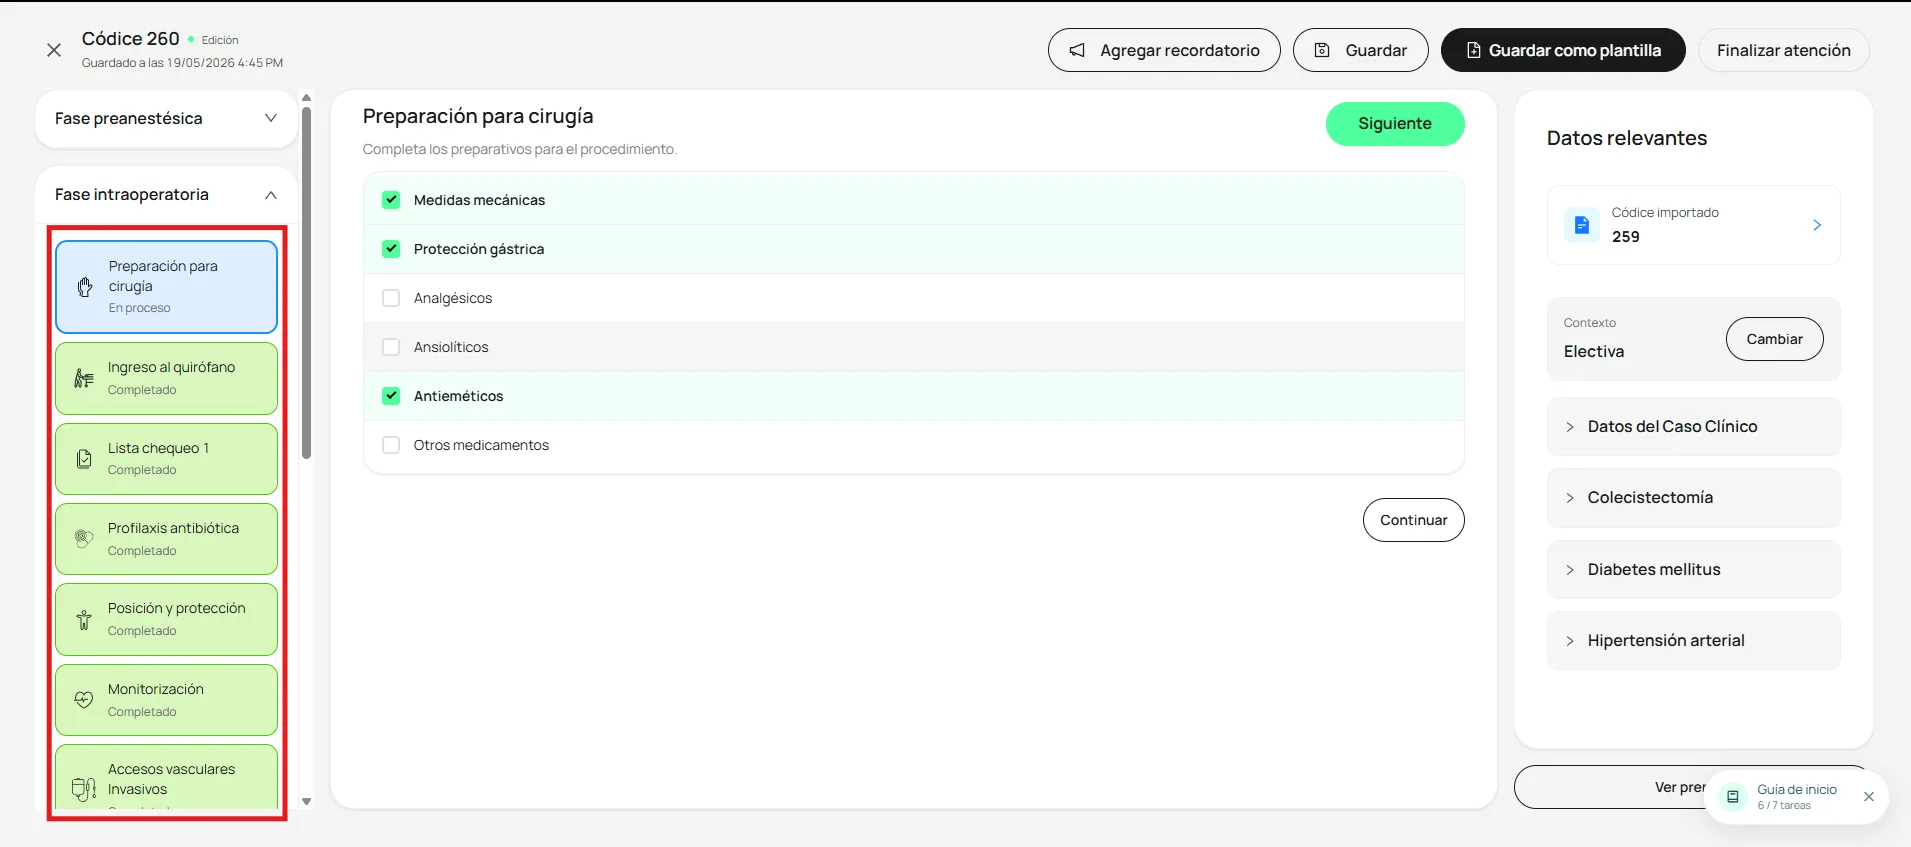
The intraoperative phase is made up of 14 sections that you complete in order. Each one comes with a standard prefilled note built from the procedure and the patient’s data; you can keep it as is or adjust the details. Click Next when you finish each section.
The 14 sections are:
- Surgery preparation — applicable premedications (mechanical measures, gastric protection, analgesics, anxiolytics, antiemetics, others).
- Operating room admission — OR number, room temperature, time of arrival, and vital signs.
- Checklist 1 — pre-anesthetic safety check with a standard or custom note.
- Antibiotic prophylaxis — recommended antibiotic for the procedure (IDSA guideline), with renal dose adjustment when needed.
- Position and protection — position preloaded for the procedure, plus selectable pressure-point protections.
- Monitoring — standard or advanced, depending on the case.
- Invasive vascular access — choose the access and its parameters; Morton writes the procedure note.
- Checklist 2 — surgical team time-out.
- Anesthetic technique — main technique (balanced general, TIVA, local, peripheral nerve block, neuraxial, sedation), an optional combination, and weight-based doses for induction agents, opioids, neuromuscular blockers, and adjuncts.
- Airway — suggestions based on age and weight, device, technique, attempts, complications, and ventilator settings.
- Intraoperative — the record kept during the procedure (analgesia, antiemetics, infusions, vasoactives, diagnostic tests, losses, events, and complications).
- Closing record — end-of-surgery time and details of surgical closure.
- Checklist 3 — postoperative recommendations and orders.
- Transfer — Aldrete score, destination, time out of the OR, and condition on transfer.
Open the prenote
Once you close the Transfer section, click View prenote to open the prenote editor.
Generate the intraoperative prenote
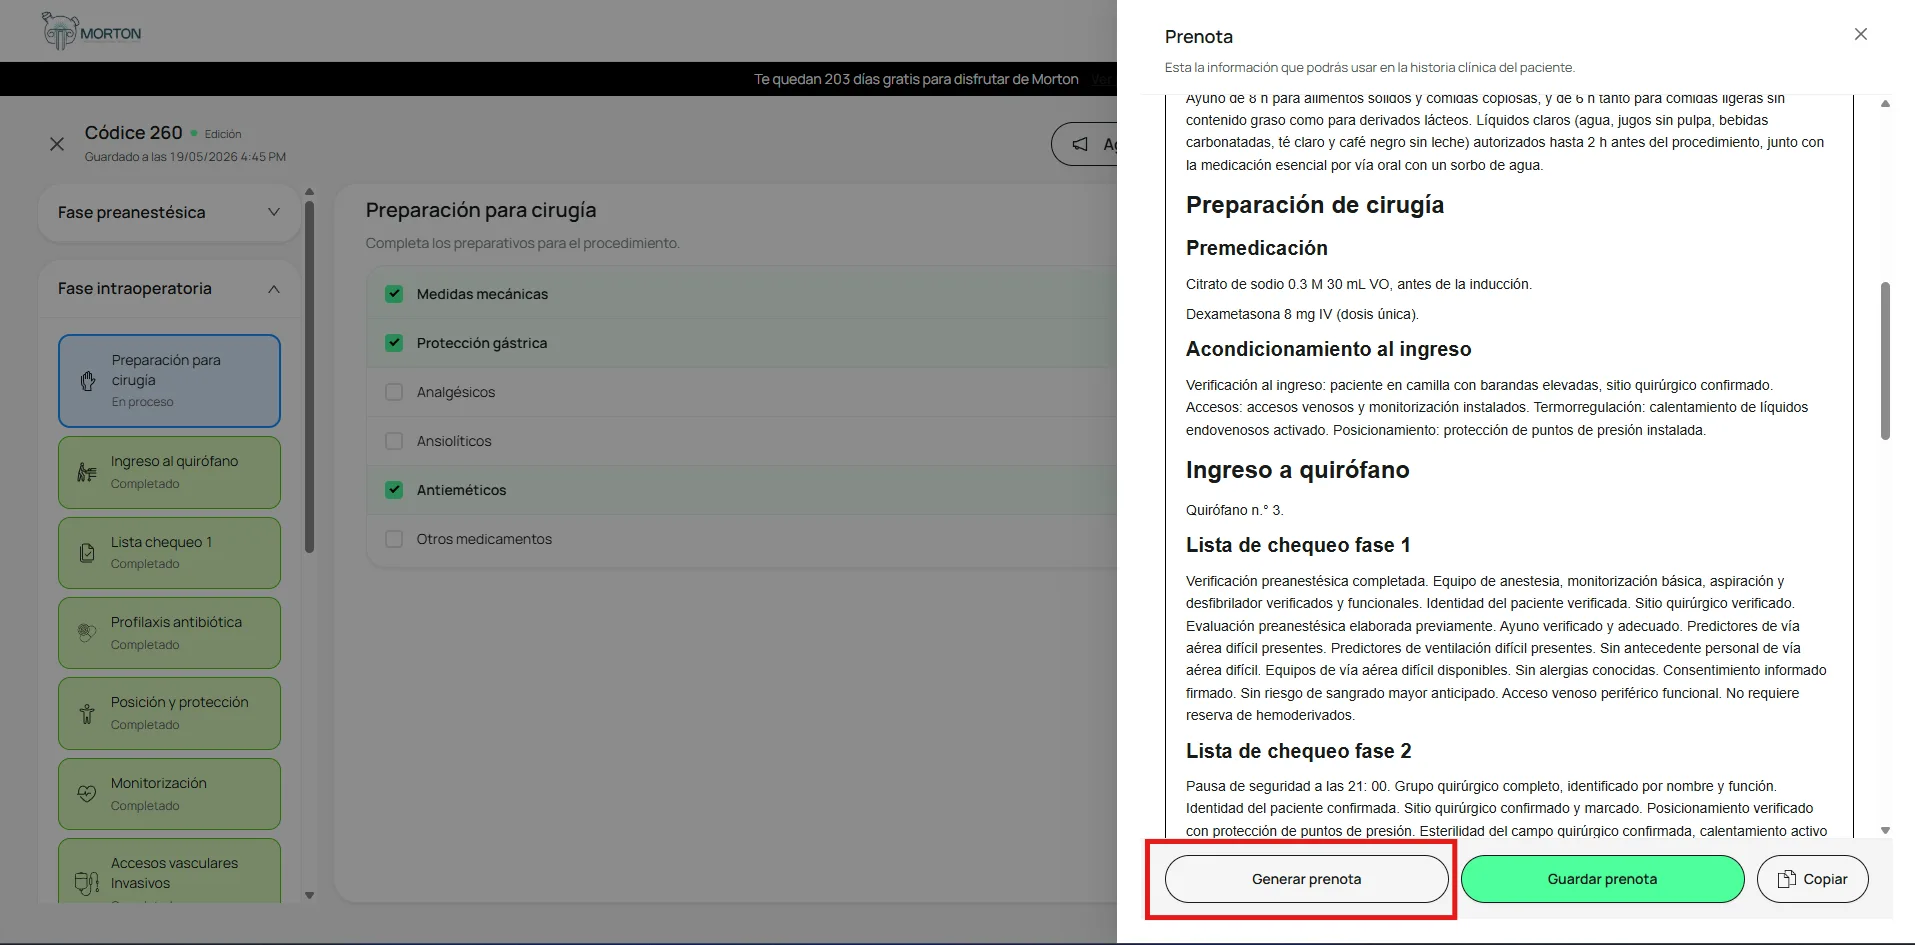
In the prenote editor, click Generate prenote. Morton pulls the 14 sections together into a single structured document, ready for review.
From here on, the flow is the same as for the pre-anesthetic prenote:
- To edit and format the text, see Edit the prenote before saving it.
- To save it, copy it into your institution’s medical record, and close the case, see How to save the prenote and close the case.
Your intraoperative prenote is ready to review, edit, and sign. The case stays in your history under its codex, so you can pick it up again or continue with the postoperative phase.
What if something goes wrong?
You forgot to click Next in a subsection
Content isn't added to the prenote until you move on with Next. If a section shows as "In progress" or "Incomplete," open it again, fill in what's missing, and click Next.
The prefilled note doesn't match the actual case
The standard note is a starting point built from the procedure and the patient's general data. Review each section before generating the prenote and adjust anything that differs in your case.
Related articles